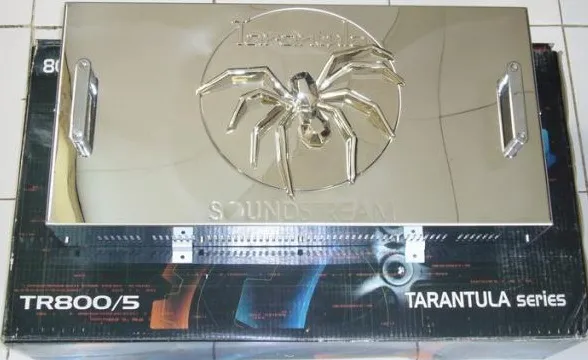
Understanding the Soundstream Tarantula 1300W Amp
The Soundstream Tarantula 1300W amplifier is a powerful piece of audio equipment designed to significantly enhance the sound quality in your car. This amplifier is engineered to deliver robust power to your subwoofers, creating a deep and immersive bass experience. Known for its reliability and performance, the Tarantula series from Soundstream is a popular choice among car audio enthusiasts. Before you begin the installation process, it’s crucial to understand what makes this amp stand out. The 1300W rating refers to the maximum power output the amp can deliver, ensuring your subwoofers receive sufficient power for optimal performance. The amplifier is built to handle the demands of high-performance car audio systems, providing clear and undistorted sound even at high volumes.
Key Features of the Tarantula 1300W Amp
The Soundstream Tarantula 1300W amp comes packed with several features that contribute to its popularity. Firstly, its high power output capability is a key selling point, allowing it to drive even the most demanding subwoofers. The amplifier typically includes built-in protection circuitry to prevent damage from overheating, short circuits, and overloads, ensuring its longevity. Furthermore, it often has adjustable gain controls, enabling users to fine-tune the output to match the connected speakers and the car’s audio system. Additionally, many Tarantula amps feature low-pass and high-pass filters, providing the user with additional control over the frequencies that the amp outputs, to send the correct signal to the connected speakers. Finally, the amp often includes both RCA inputs and speaker-level inputs, offering flexibility in system integration and compatibility with a wide range of head units.
Power and Performance Specifications

When evaluating the Soundstream Tarantula 1300W amp, understanding its power and performance specifications is critical. The 1300W rating generally refers to the maximum power output. However, continuous power (RMS) ratings are more indicative of the amp’s actual performance. The RMS power output will vary depending on the number of channels used and the impedance (ohms) of the connected speakers. For instance, you might see an RMS power rating of 400W x 1 at 4 ohms, and 650W x 1 at 2 ohms. The amp’s frequency response (e.g., 10 Hz - 250 Hz) specifies the range of frequencies the amplifier can reproduce, which is important for bass performance. Distortion levels (e.g., <0.05% THD) are another key spec, which indicates how cleanly the amp amplifies the sound signal, with lower numbers indicating a cleaner sound. Finally, signal-to-noise ratio (e.g., >90dB) measures the amp’s ability to amplify the signal without adding noise.
What to Consider Before Installation
Before installing your Soundstream Tarantula 1300W amp, careful planning is necessary. The first consideration is the location of the amplifier in your vehicle. It should be placed in a secure location, preferably in the trunk or under a seat, where it is protected from moisture and physical damage. Next, ensure you have all the necessary tools and materials, including wiring, connectors, fuses, and mounting hardware. Determine the appropriate gauge of the power and ground wires; this depends on the amp’s power output and the length of the wires. It’s also crucial to ensure that the vehicle’s electrical system can handle the additional power draw of the amplifier. Finally, consider the placement of the subwoofers and the overall acoustic design of your car audio system. Proper planning will make the installation process easier and ensure optimal performance.
Choosing the Right Subwoofers
Selecting the right subwoofers is essential to maximizing the performance of your Soundstream Tarantula 1300W amp. Consider the impedance (ohms) of the subwoofers; the amp’s power output changes based on the impedance load. Two or four-ohm subwoofers are common choices. Next, determine the subwoofer’s power handling capabilities to ensure they can handle the amp’s power output. Mismatched power ratings can lead to either underperformance or damage. Also, consider the size and type of subwoofers, which affects the bass response. Sealed enclosures typically offer tighter, more accurate bass, while ported enclosures provide louder, deeper bass. Dual voice coil subwoofers give more flexibility in wiring options to match the amp’s impedance. Finally, always review the specifications of both the amplifier and the subwoofers to ensure they are compatible and that the amp provides the best power match.
Soundstream Tarantula 1300W Amp Installation Guide

Tools and Materials Needed
Gathering the right tools and materials is the first step in a successful Soundstream Tarantula 1300W amp installation. You’ll need a wire stripper and crimper for preparing and connecting wires, a set of screwdrivers (Phillips head and flathead) for various connections, and a multimeter to check for voltage and continuity. Additionally, a drill may be needed for mounting the amp and subwoofers. Regarding materials, you’ll need a power wire kit appropriate for the amp’s power rating, including a fuse holder and fuse, a ground wire, RCA cables to connect the head unit to the amp, speaker wire to connect the amp to the subwoofers, and various connectors (ring terminals, spade terminals, etc.) to make secure connections. Finally, consider using zip ties or wire loom to keep the wires organized and protected, and mounting screws to secure the amplifier to your vehicle.
Wiring the Amp and Subwoofers
Wiring your Soundstream Tarantula 1300W amp involves several critical steps to ensure proper functionality and safety. Begin by disconnecting the negative terminal of your car’s battery to prevent electrical shorts during the installation. Run the power wire from the battery (through the fuse holder) to the amplifier. The ground wire from the amp should be connected to a solid metal chassis point in the vehicle, ensuring a clean and secure ground. Connect the RCA cables from your head unit to the amp’s input. Use speaker wire to connect the amplifier’s output to the subwoofers, paying close attention to polarity. Always double-check all connections before reconnecting the battery to avoid any potential issues. Secure all wires using zip ties or wire loom to prevent damage and ensure a tidy installation. A well-organized wiring setup is important for the longevity of your audio system.
Connecting the Power and Ground Wires

Connecting the power and ground wires is critical for the Soundstream Tarantula 1300W amp. The power wire, usually a thick cable, connects from the positive (+) terminal of your car battery (through the fuse holder) to the power input terminal on the amplifier. Ensure the fuse is placed near the battery for safety, and make sure the fuse rating matches the amp’s requirements. The ground wire, also a thick cable, connects from the amplifier’s ground terminal to a bare metal point on the car’s chassis. It is crucial to have a clean, rust-free connection for optimal performance. Use ring terminals to secure the wires at the battery and amplifier terminals for a secure connection. Make sure the ground wire is as short as possible to minimize resistance. Tighten all connections firmly to prevent loose connections.
Connecting the Speaker Wires
The speaker wire connections must be made with careful attention to the polarity of the speaker wires. This ensures that the speakers move in the same direction, which is crucial for the performance of the bass. Connect the speaker wires from the amplifier’s speaker output terminals to the terminals on the subwoofers. The positive (+) terminal of the amp connects to the positive (+) terminal of the subwoofer and the same with negative terminals. Use crimp connectors or solder the speaker wire connections for a secure and reliable connection. Make sure to double-check your wiring against the manufacturer’s diagrams. Correctly connecting the speaker wires ensures the subwoofer moves in the right direction, producing the full impact of the bass. Properly connected speaker wires are vital for sound quality.
Adjusting Amplifier Settings
Once all the physical connections are made, the next step is adjusting the amplifier’s settings. Begin by setting the gain controls. The gain controls the amount of signal amplification. Start with the gain turned all the way down and gradually increase it until the sound becomes clear without distortion. Use a test tone or music track to help you fine-tune the gain. Next, adjust the low-pass filter, which determines the highest frequencies the amplifier will send to your subwoofer. Set the filter at the frequency that best complements your subwoofers and the rest of your car audio system. If your amp has a subsonic filter, set it to prevent the subwoofers from playing ultra-low frequencies that can cause damage. Proper adjustment is important for maximizing sound quality and protecting your equipment.
Troubleshooting Common Issues

No Power or Sound
If your Soundstream Tarantula 1300W amp isn’t producing any power or sound, begin by checking the basics. Verify the power and ground connections; a loose connection can prevent the amp from working. Check the fuse on both the amp and the fuse holder near the battery; a blown fuse is a common cause. Ensure your head unit is properly connected and sending a signal to the amplifier. Test the remote turn-on wire, which tells the amp when to switch on; this wire should receive 12 volts when the head unit is on. Use a multimeter to check for voltage at the power and ground terminals. Also, check the RCA cables for good connection and the speaker wires for shorts or disconnections. By carefully reviewing these steps, you can quickly identify the root cause.
Distorted Sound
Distorted sound is a common problem, and several factors can cause it. The most common cause of distortion is the amp being overdriven. Reduce the gain settings and re-evaluate the sound. Check the input signal from your head unit; the source audio might be the cause, try playing a different audio source to verify. Make sure the speaker wires are connected correctly and are not damaged or frayed. Check if the subwoofers are properly wired and functioning correctly. Examine the crossover settings; incorrect settings might be allowing the amplifier to try to reproduce frequencies it shouldn’t. Also, ensure the amplifier isn’t overheating. Addressing these issues can often resolve distortion problems and restore sound quality. Finally, you can also check if the gain is set too high.
Overheating Problems

Overheating can lead to your Soundstream Tarantula 1300W amp shutting down or producing distorted sound. Ensure the amplifier has adequate ventilation; do not place it in an enclosed space without airflow. Check the impedance of the subwoofers; using subwoofers with too low an impedance can cause the amp to overheat. Verify the wiring connections and ensure they are not shorting. Make sure the amplifier isn’t being overdriven by playing the system at excessively high volumes for extended periods. Consider relocating the amp to a cooler location in the vehicle. If overheating persists, it may indicate a problem with the amplifier itself, and professional inspection may be needed. Proper ventilation is a key to preventing overheating.
Maximizing Sound Quality
Optimal Gain Settings
Setting the gain controls correctly is crucial for maximizing sound quality. The gain controls amplify the input signal, but too much gain leads to distortion. Start with the gain turned all the way down. Turn up the head unit volume to about three-quarters of its maximum level. Gradually increase the gain on the amplifier until you begin to hear distortion. Then, back off the gain slightly until the distortion disappears. Use a test tone or music track to help you fine-tune the gain. If you use a multimeter, adjust the gain to the desired voltage output based on the amplifier’s specifications. Optimal gain settings help to prevent distortion and help get the most power out of your system. The goal is to get the most volume without distortion.
Crossover Adjustment Tips

Proper crossover adjustment is critical for achieving the best sound quality from your Soundstream Tarantula 1300W amp. The low-pass filter on the amplifier lets low frequencies pass through to the subwoofers while blocking higher frequencies. The ideal setting for the low-pass filter depends on the subwoofers and the car’s speakers. Start by setting the low-pass filter at around 80 Hz for a balance. Experiment with higher or lower settings to find what sounds best. If your amp has a subsonic filter, set it to prevent the subwoofers from playing ultra-low frequencies, which can damage them. Careful adjustments to the crossover settings will help you create a clean, full sound that is balanced across all frequencies.
Improving Your Car Audio Experience
Upgrading to a Soundstream Tarantula 1300W amp is a significant step toward a better car audio experience. However, there are additional steps to take to maximize your audio enjoyment. Consider upgrading your head unit to one with better sound quality and more features. Use high-quality RCA cables to minimize signal loss. Proper sound damping and soundproofing in your car can significantly reduce unwanted noise and improve the clarity of the music. Optimize your speaker placement to create a better soundstage. Also, always ensure that your amp and subwoofers are set up properly to the head unit. Regularly maintain your system, checking connections and making adjustments as needed, will keep your system performing its best. Taking care of your car audio system ensures long-lasting enjoyment.