Getting Started Drawing a Rose Hair Tarantula
Drawing a rose hair tarantula can be a rewarding experience, allowing you to appreciate the intricate beauty of these fascinating creatures. This easy guide will walk you through the essential steps, from gathering your supplies to adding those final details that bring your tarantula to life. Whether you’re a beginner or have some drawing experience, this guide will help you create a realistic and stunning depiction of a rose hair tarantula. Get ready to unleash your inner artist and discover the joy of drawing these amazing arachnids!
Gathering Your Supplies
Before you begin, it’s crucial to gather the right supplies. The quality of your materials can significantly impact the final result. Investing in good-quality drawing tools will make the process more enjoyable and improve your artwork. This section covers the essentials you’ll need to get started, setting you up for success as you embark on your drawing journey.
Choosing the Right Paper

The type of paper you use is fundamental to your drawing success. For drawing a rose hair tarantula, a smooth or medium-texture paper is recommended. Smooth paper is ideal for detailed work, allowing for fine lines and precise shading. Medium-texture paper provides some tooth, which helps with blending and creating texture. Avoid using very rough paper, as it can be challenging to achieve smooth gradients. Consider a paper weight of at least 70lb (110gsm) to prevent the paper from buckling under repeated erasing and shading.
Selecting Your Pencils
Pencils are your primary tools for creating your tarantula drawing. A range of pencil grades is essential to achieve the desired effects. Start with a set that includes pencils from 2H to 6B. 2H pencils are excellent for light sketching and creating guidelines. HB or F pencils are suitable for general outlines and details. For shading and adding depth, use softer pencils like 2B, 4B, and 6B. These softer pencils will deposit more graphite, making it easier to achieve darker tones and blend the shading. A good eraser, such as a kneaded eraser and a mechanical eraser, is also indispensable for correcting mistakes and lifting highlights.
Finding a Reference Image
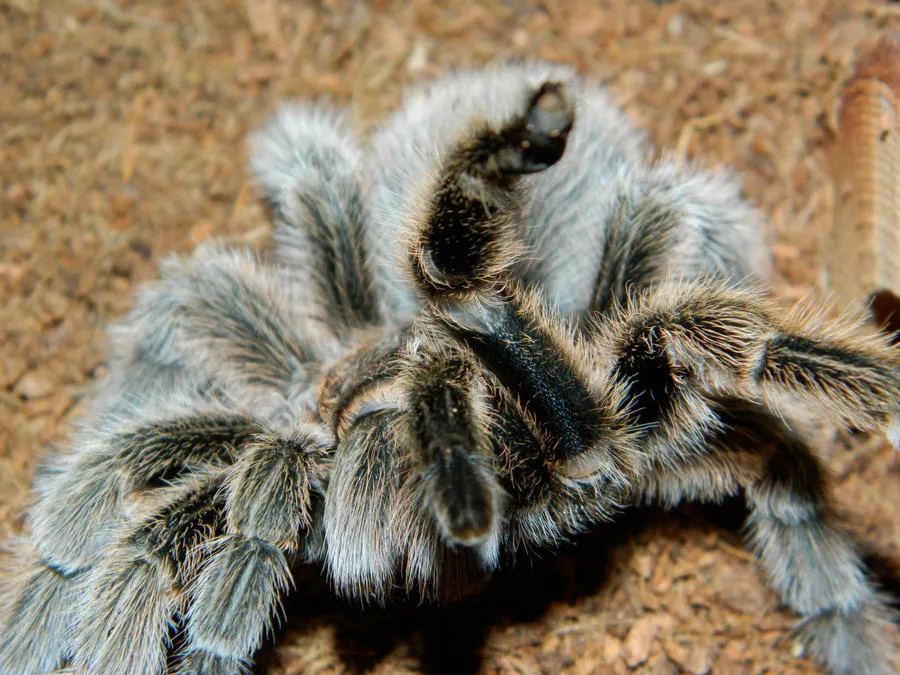
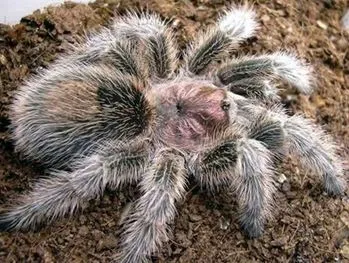
A high-quality reference image is a cornerstone of a successful drawing. The reference provides you with the visual information needed to accurately portray the rose hair tarantula. Choose a clear photo with good lighting, where you can see the tarantula’s details, including its body, legs, and the texture of its hairs. Consider multiple images from different angles to help you understand the arachnid’s form better. The more detailed your reference image, the more accurate and lifelike your drawing will be.
Understanding the Anatomy of a Rose Hair Tarantula

Before you begin to draw, it’s beneficial to understand the basic anatomy of a rose hair tarantula. This knowledge will help you create a more realistic and accurate depiction of the creature. Understanding the proportions, the structure of the body, and the arrangement of the legs and fangs is key to capturing the essence of the tarantula. The rose hair tarantula has a distinct anatomy, and careful observation will ensure your drawing is both accurate and visually appealing.
The Body Structure
The body of a rose hair tarantula consists of two main parts the cephalothorax (the combined head and thorax) and the abdomen. The cephalothorax is generally larger and more robust, while the abdomen is rounded and often covered with hairs. Notice the shape of the cephalothorax; it’s usually oval or heart-shaped. The abdomen is softer and can change shape slightly depending on the tarantula’s diet. The proportions are essential; therefore, observe the relative sizes of the two body parts in your reference image.
The Legs and Pedipalps
Tarantulas are known for their eight legs and two pedipalps. The legs are segmented, with each section having a specific shape. The pedipalps, located near the mouth, are used for sensory purposes and manipulating food. The legs are covered with hairs that add to the tarantula’s texture and appearance. When drawing the legs, pay attention to their length, thickness, and how they connect to the cephalothorax. The pedipalps are shorter and resemble small legs. Understanding the structure and arrangement of these appendages is critical for a realistic portrayal.
The Chelicerae and Fangs

The chelicerae are the mouthparts that house the fangs. These are located at the front of the cephalothorax. The fangs are typically curved and designed to inject venom. When drawing, it’s important to show the shape and position of the chelicerae and the general form of the fangs, even though they are often not fully visible. The chelicerae and fangs add a defining characteristic to the tarantula’s appearance. Pay close attention to their form and the subtle details in your reference photo.
Step-by-Step Drawing Guide
Now that you have gathered your supplies and understand the basic anatomy, it’s time to start drawing. This step-by-step guide will walk you through the process, from sketching the basic shape to adding the final details and color. Follow each step carefully, and don’t be afraid to erase and redraw until you are satisfied with the results. Remember, practice makes perfect, and the more you draw, the better you will become. Each drawing will be a learning experience, and soon you’ll master the art of drawing rose hair tarantulas.
Sketching the Basic Shape
Begin by lightly sketching the basic shapes of the tarantula. Start with the cephalothorax, which is usually an oval or heart shape. Next, sketch the abdomen, which is typically a rounded shape. These initial shapes establish the proportions of your drawing. Use light strokes with a 2H or HB pencil, as this will make it easier to erase and correct mistakes. Don’t worry about perfection at this stage; the goal is to establish the overall structure of the tarantula.
Adding the Legs and Pedipalps

Once you have the basic shapes of the body, add the legs and pedipalps. Lightly sketch the general positions and lengths of the legs, noting their segmented structure. Remember that the legs are connected to the cephalothorax. The pedipalps are smaller and located near the mouth. Carefully observe the angles and positions of the legs in your reference image. At this stage, focus on the overall arrangement and proportions, rather than the fine details.
Defining the Body Details
Once the basic structure is in place, start defining the body details. Refine the shapes of the cephalothorax and abdomen, paying attention to their contours. Add details like the eyes and the chelicerae. Start outlining the individual segments on the legs and pedipalps. Begin to add some of the hair texture, using short, light strokes to suggest the fuzzy appearance of the tarantula. Refer to your reference image and focus on accuracy. Take your time and build up the details gradually.
Adding Texture and Color
Now, bring your tarantula to life by adding texture and color. Using various pencils, start shading the body to create depth. Rose hair tarantulas have a range of colors, from light browns to darker shades. Begin by applying lighter tones and gradually layering darker tones to create shadows and highlights. Use short, light strokes to create a fuzzy texture on the abdomen and legs, mimicking the tarantula’s hairs. Blend the colors and textures to achieve a realistic effect. This is where your drawing will really come to life!
Tips for Shading and Detailing

Shading and detailing are the keys to creating a realistic drawing. They add depth, texture, and visual interest to your artwork. The following tips will help you master these techniques, allowing you to create a stunning depiction of a rose hair tarantula. Remember to practice and experiment with different shading methods to find what works best for you.
Creating Depth with Shading
Shading is essential for creating the illusion of depth and three-dimensionality. Use a range of pencil grades (2B to 6B) to create shadows and highlights. Identify the light source in your reference image and shade accordingly. Areas away from the light source will be darker, while areas closer to the light source will be lighter. Use blending stumps or your finger to smooth out the shading and create seamless transitions between tones. Build up the shading gradually, starting with light layers and adding darker tones as needed. This technique will add the illusion of depth and dimension to the body.
Adding Fine Details for Realism
The fine details are what bring your drawing to life. Use sharp pencils (HB or higher) to add small details like the eyes, the chelicerae, and the texture of the hairs. Use short, delicate strokes to suggest the fuzzy appearance of the tarantula’s hairs. Pay attention to the direction of the hairs and how they catch the light. Study your reference image closely and look for any unique markings or patterns on the tarantula’s body. Adding these fine details will make your drawing more realistic and captivating. Consider the use of a mechanical eraser to create very fine highlights to enhance the realism.
Common Mistakes to Avoid

Avoiding common mistakes is critical for producing a polished and professional-looking drawing. Be mindful of the following pitfalls, and you’ll significantly improve your chances of creating a stunning representation of a rose hair tarantula. Recognizing and correcting these errors will help you refine your technique and achieve better results.
Rushing the Sketch
One of the most common mistakes is rushing the initial sketch. Taking your time to accurately establish the proportions and basic shapes is crucial. A rushed sketch will result in inaccurate proportions and difficulties later on. Work carefully and methodically, ensuring that the basic structure is correct before moving on to the details. If you are unsure, take extra time to measure and double-check the proportions against your reference image. A well-executed sketch will lay the foundation for a successful drawing.
Overcomplicating the Details
Another common mistake is overcomplicating the details too early in the process. Focus on the overall form and structure before getting lost in the small details. Adding too many details before the basic shape is established can make the drawing look cluttered and unbalanced. Build up the details gradually, starting with the essential elements and working your way to the finer points. This approach will allow you to maintain a sense of control and create a more cohesive artwork. Remember, patience and a step-by-step approach are key.
Conclusion
Drawing a rose hair tarantula can be an enjoyable and rewarding endeavor. By following these easy steps and practicing regularly, you can create a stunning and realistic representation of this fascinating creature. Remember to gather your supplies, study the anatomy, and take your time. Don’t be afraid to experiment with different techniques and styles. Each drawing will be an opportunity to improve your skills and discover new things. Enjoy the process and the satisfaction of bringing a rose hair tarantula to life on paper!